- Ê
- Â
Y Website isn’t working? try replacing “https” with “http” in the url. sorry :(
We are working on fixing this issue. Hope to iron things out shortly.
Comments are closed.
Y The infamous brush
Since many of you enjoyed reading my note to James about the brush I damaged, here’s what the rest of it looked like:
Comments are closed.
Y Finish?
Hillary Asked:
“Do we have to apply finish to our plywood cnc objects?”
You are not required to apply finish to your objects, but we would like to consider these as “finished” works, since there were several rounds of studies, models, mock-ups, etc. We expect that they are finessed beyond what came directly off the machine – this might require sanding some edges smooth, taking the surfaces to a higher grit, etc. Rubbing on a coat or two of wax might be enough to to take them to the next level. We will evaluate them for their integrity as objects, but it is not necessary that they have elaborate finish work (although we welcome it if you are interested).
( Watch Videos Faster (or slower)
The recent videos I posted are not sped up like some of the others I have posted are. You can get a browser extension that will let you speed up (or slow down) the videos as you like.
Chrome:
Playback speed for embedded vimeo
Playback Rate
FireFox:
Faster Video
I’m sure there are similar options for Safari, but I can’t seem to find a free one.
( Default Settings in MasterCAM (updated)
This video shows how to configure default settings in MasterCAM. This makes it so you don’t need to choose settings each time you work on a new project.
Here are the recommended settings for the toolpaths we have covered so far. Keep in mind that some of the settings will need to change depending on the needs of the project, the material you are cutting and the tool being used.
í Assignment 11 (updated)
Part 1: Plywood Object
Finish and assemble your plywood object. This project will be the subject of the final critique, next week on May 15.
Part 2A: Surface Driven Toolpaths
Follow along with the tutorial to create toolpaths for a simple paneled surface. You can download the Rhino file used in the demonstration below:
https://3d2017.christopherspecce.com/wp-content/uploads/2017/05/PlusPanel.zip
Part 2B: 2 Sided Surface Driven Toolpaths
Follow along with the demonstration below to create a “Flip Mill” series of toolpaths for your spoon.
Make two screenshots of the completed “verify” for both Machine Groups from MasterCAM: one showing the top, one showing the bottom. Create a new folder called “CAM” in your folder for “Spoon” project on the shared google drive. Place these two screenshots and your MasterCAM file in this new sub-folder. Name your files so we can easily identify you as the author and know which project this is for.
í Assignment 10
Part 1. MasterCAM
If you don’t have your MasterCAM file done yet, we might not be able to get your part cut on time. Get this file done!!
Part 2: Spoon Modeling
Follow along with the video tutorial below and build the spoon shown.
Using the modeling strategy demonstrated in this video, build a new spoon of your own creation. Because you are to use the same strategy as was demonstrated, there is a limit to how different your design can be – proportions and dimensions can change, the cross sections can vary, etc, but you should not need to develop new techniques to build your design. The purpose of this exercise is to gain experience building a complex object like this, but with guidance to ensure the modeling strategy is sound.
Work in layers to organize your model, saving curves, and other construction geometry in a logical, organized fashion. Create a rendering with Keyshot of your model showing several instances of your design arranged into a composition. You should arrange the numerous instances of your spoon in Rhino, then bring it into Keyshot for rendering.
Upload your model and rendering to the shared google folder in the “Spoon” folder. Create a new folder for yourself in this shared folder. Name your files so that it is evident to us who you are and what project this is.
Comments are closed.
í Week 10 Challenge: Metal Spoon
Build a model of the metal spoon that has been distributed in class. Orthographic top and side view images of the spoon are provided for your convenience below.


Comments are closed.
í Assignment 9
Part 1: MasterCAM
Make any necessary modifications to your Rhino file as needed to facilitate the completion and perfection of your MasterCAM file for the Plywood Object Project. You final MasterCAM file should go in folder called “Final” within your personal folder for the Plywood Object Project. Sign up for a time to cut your project on the CNC machine. This would also be a good time to consider finishing options.
Part 2: Make Up Work
If you are missing any work, this is a good week to make sure you are all caught up. Make sure your work is following the assignment submission criteria and includes all of the deliverables.
Comments are closed.
Y CNC Schedule
I’m sharing the link to the CNC schedule here. You need to be logged into your RISD email to edit this document.
https://docs.google.com/spreadsheets/d/1ZIOgMEc8BHpPPQEzs9w3lbSpXUyoJ97N0ww_eUgY_1E/edit#gid=0
í Week 9 Challenge: Y Branch
Build the object shown below. The Rhino file available here has curves you can use as a reference to build with / from.
https://3d2017.christopherspecce.com/wp-content/uploads/2017/04/Y-Branch-Challenge2017.zip

Comments are closed.
B Recommended Settings for MasterCAM
I’ve created a PDF that has recommended settings for the contour, drill, and pocket toolpaths. You will see that things are different for the Drill operation. You should choose the “circle mill” option for the toolpath type for the drill operation. This option works better than the “peck drill” operation we used previously. You should also keep in mind that some settings are variable, such as depth, and might not necessarily need the settings indicated in the document. See the PDF below for details.
B Step Stool MasterCAM and Rhino files
You can download the Rhino and MasterCAM files of the small step stool we have looked at in class. They are both contained in the zip folder below
https://3d2017.christopherspecce.com/wp-content/uploads/2017/04/StepStoolExample.zip

Y Double Clicking a MasterCAM file won’t open it
I just wanted to make everyone aware that if you double click on a MasterCAM file (on your desktop or in a folder), it will open MasterCAM, but it will not open the file you double clicked on. You need to open the file from within MasterCAM.
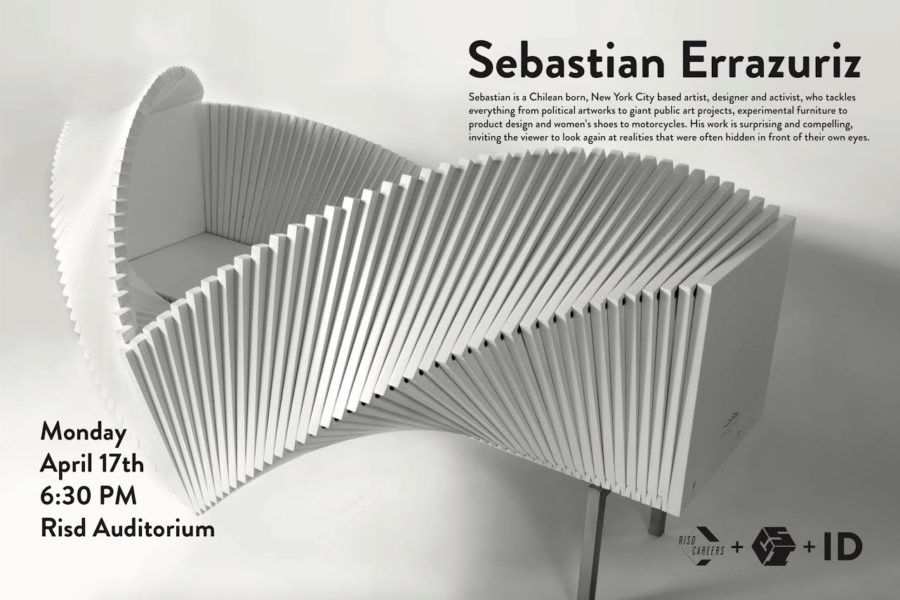
Y Sebastian Errazuriz Lecture tonight (4/17)
Sebastian Errazuriz lecture tonight at 6:30 in the RISD auditorium.
Comments are closed.
í Assignment 8
Model Refinements and MasterCAM
1. Make any necessary revisions or refinements to your model so the design is completely finalized.
2. Optimize your cut pattern, contours, and joinery for production on the CNC router with a 15/32″ diameter cutting tool.
3. Create a MasterCAM for your project. Some things to keep in mind:
- you can only use three toolpath types for this project
- contour
- drill
- capture operations with the same settings in a single operation (hypothetical example: all pockets that cut halfway through should be in the same operation, all contours that cut on center all of the way through should be in one operation, etc, etc.
- leave at least a 1/2 margin on the edge of your sheet
- tabs should be set to VERTICAL MOVES (NOT ramp moves) with a thickness of .125″ and a width of .75″
- for drilling operations, set the spindle speed to 6,000 rpm and the plunge rate to 15 ipm
Use this Rhino file as a template as a reference for how your model should be situated relative to zero and the X,Y axes.
Create a new folder called Phase 3 in your folder in the “Plywood Object” folder on the shared google drive. Put your final Rhino file and your MasterCAM file in this folder. If your files (especially MasterCAM) are not uploaded by the next class (April 24, 2017), we can not guarantee your project will be cut on time. Make sure your Rhino file uses layers to organize all of the various elements and iterations in your file. This will be taken into consideration for grading purposes.
Comments are closed.
í Week 8 Challenge: X
Working from the provided Rhino file, build the form shown below (do not use the patch tool!)

Orthographic Views:

Comments are closed.
í Assignment 7
Revise and refine your Plywood Furniture Object designs as was discussed during the reviews in class. This phase of this project is to finalize the design, resolving issues related to form, dimensions, structure and joinery. For some of you, this means more incremental improvements, others will require more drastic reworking of your design. Regardless, after this phase of the project, we will be working with MasterCAM to create toolpaths for the CNC machine. Students should finalize their design so that the MasterCAM phase will be focused on optimizing for machining (as was discussed in class) and not on design.
For next week, you will be required to create another model of your design. We have discussed the requirements based on student feedback and have decided that models can be 1:2 scale models or full scale, but the material thickness should be scaled appropriately. If you decide to make a 1:1 model, you should use 1/2″ foam core.
If your design does not require major revisions, you are encouraged to begin developing strategies for how you will deal with the rounded terminals associated with cutting on the router. As was shown in class, creating “I” shaped mortises and tenons with cleared out corners is an advisable way to deal with this. If your design is fairly well resolved, you can try to include these features in your next model.
In your folder within the plywood object folder in the class Google Drive, create a sub-folder for last week’s assignment called “Phase 1”. Create a second sub-folder called “Phase 2”. Create the following files and put them in this folder for this week:
- a photo of your second scale model named “FirstnameLastname_PlywoodScaleModel2.jpg”
- a screenshot or rendering of your rhino model named “FirstnameLastname_PlywoodModelRendering2.jpg”
- and an image of your nesting scheme for the parts named “FirstnameLastname_PlywoodNesting2.jpg”
Comments are closed.
B Switching viewports?
Hannah asked today: “Is there a keystroke to switch between viewports?”
Yes, there is:
- Windows: CTRL+Tab
- Mac: Command +Tab
You can also toggle maximizing the active viewport by pressing CTRL (windows) or Command (Mac) + M
Comments are closed.
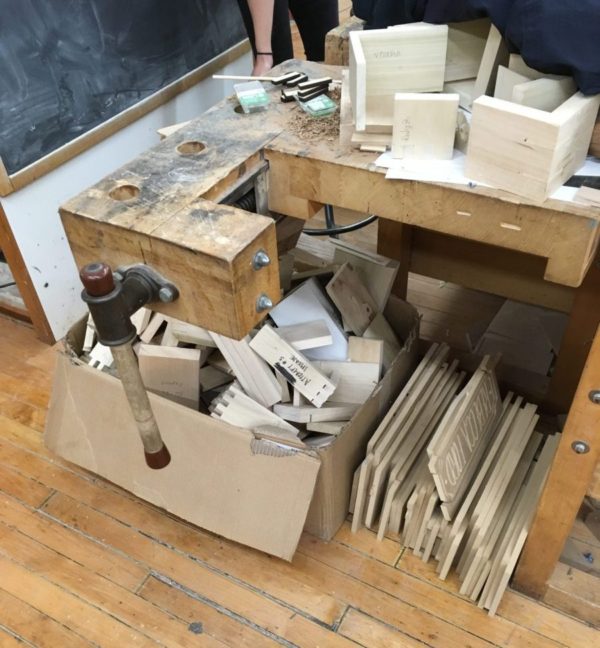
Y Name Plates
We cut the name plates on Wednesday and they are in the woodshop, under the monitor’s bench (by the chalkboard). Please claim your’s.

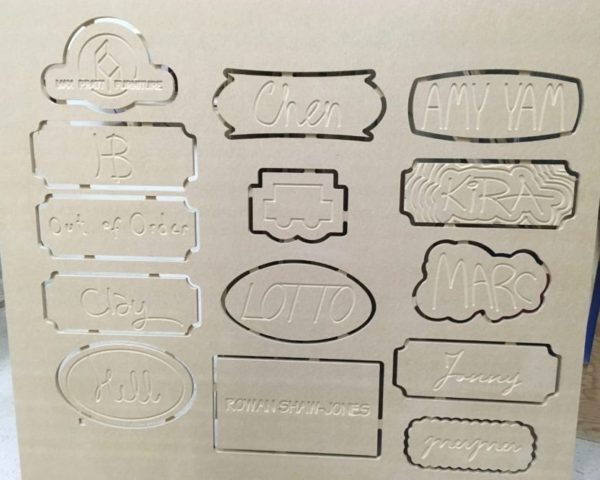
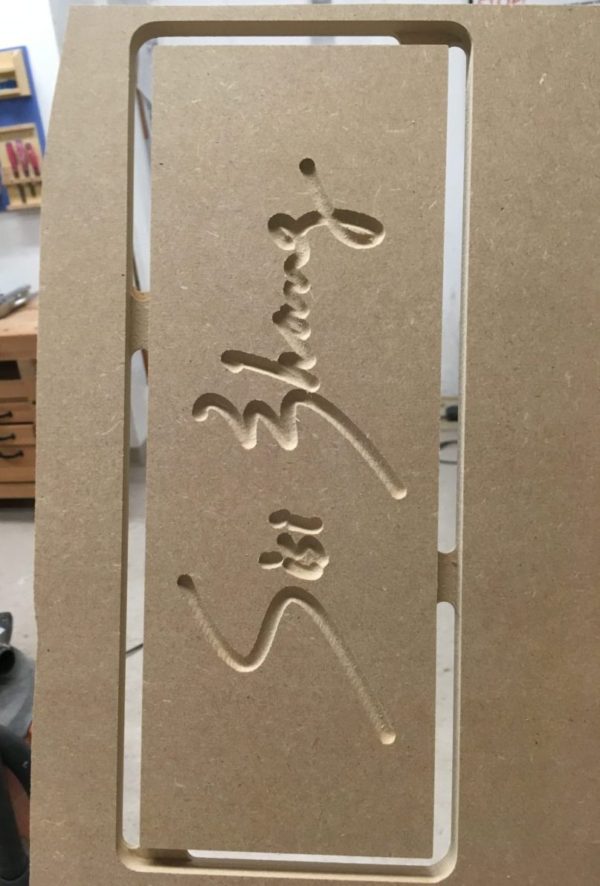
You’ll see that they still have the tabs connecting them to a larger piece of MDF. you can cut them free on the bandsaw and then sand the edges to be smooth.
( Mastercam Display issues in Parallels
As many of you found firsthand in class, sometimes running MasterCAM in Parallels will end up having display issues, specifically when moving the model around in the viewport it will ghost. After testing we discovered this problem occurs when you switch the display mode of Parallels (fullscreen to windowed mode or vice-versa), or sometimes when you adjust the window size. It seems that switching to Coherence Mode will resolve or prevent this bug from occurring. To do this Parallels has several interfaces where you can choose the menu item View>Enter Coherence, or use press: command-control-C

Coherence eliminates the Windows operating system and makes MasterCAM or any other Windows application or file browser appear like a Mac app. This can make finding files through the windows desktop tricky; you can either exit Coherence mode and minimize the MasterCAM window or click on the Windows 10 icon in the Mac Dock to open the start menu and find your files through the window that opens there. We’re not sure if this will completely eliminate this issue but so far it seems to have; if you run into this issue and this fix doesn’t work, or you encounter any others, please let us know.
B Another explanation of surface continuity
This page has a perhaps more entertaining way to discuss surface continuity, but it also covers higher orders of continuity – G3 and G4.
https://www.augi.com/articles/detail/an-introduction-to-surface-continuity
B More about NURBS
If you’re curious to learn more about NURBS, I’m sharing a couple of links that go more in depth on how this geometry works.
This article links to a somewhat comprehensive definition of NURBS
http://www.rhino3d.com/nurbs
This article links to two other that are more deep in their description, with equations and formulas that are quite complex:
http://www.mactech.com/articles/develop/issue_25/schneider.html
http://web.cs.wpi.edu/~matt/courses/cs563/talks/nurbs.html
The Wikipedia page for NURBS is also a useful reference:
https://en.wikipedia.org/wiki/Non-uniform_rational_B-spline
í Assignment 6
Part 1: Chair Exercise
Finish the chair exercise that was started in class. Be sure to post a rendering to the class folder (both in your personal folder and the group folder).
Part 2: Plywood Furniture
Working from the Plywood Furniture project brief, make a 1:2 scale model of your design. Use a material that is properly scaled (1/4″ thick) for the production of your model. You are welcome to use the laser cutter for this project, but be aware that only certain materials can be cut with this machine.
Create a folder in the shared google drive with your name and place in that folder:
- a photo of your scale model named “FirstnameLastname_PlywoodScaleModel.jpg”
- a screenshot or rendering of your rhino model named “FirstnameLastname_PlywoodModelRendering.jpg”
- and an image of your nesting scheme for the parts named “FirstnameLastname_PlywoodNesting.jpg”
Comments are closed.
í Week 6 Exercise: Chair Modeling
Create several chair models, each one using the following commands as the primary (if not exclusive) method for creating the form:
- Revolve
- Extrude
- loft
- Sweep1
- Sweep2
- NetworkSrf
Put each model on a layer in the same Rhino file. Using Keyshot, create a rendering of the 5 chairs in one image. Post this image to the shared google drive. Name this file: FirstnameLastname_6Chairs.jpg
Comments are closed.
í Week 6 Challenge: Torqued Ring
Using the Rhino file provided below as a starting point, build the object shown below, paying attention to the transition between surfaces.
https://3d2017.christopherspecce.com/wp-content/uploads/2017/04/TorquedRing.zip

Comments are closed.
( Adjusting the resolution of Parallels for Retina Displays
I sent an email with this information but I’ll post here as well.
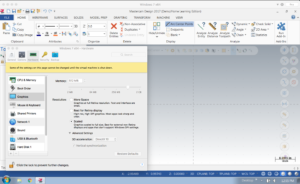
I wanted to share some information regarding running windows via parallels, particularly to mac users with Retina screen (high resolution) Apple laptops. The mastercam interface will probably appear less than ideal using Parallel’s default setting (if you have a retina display), particularly the menus and interface. You can adjust the way parallels displays windows if you open the configure window from the top menu (see image 1). Under the Graphics option you can change the Resolution to Scaled which will work better with Mastercam. If you are running into issues with mastercam operating in windows on Parallels please let Chris and I know and we’ll try to help.

( Updated Tool Library with Plywood Bit
Hello All, as I mentioned yesterday in the demo, we’ll be using a specific bit for our plywood furniture assignment after Spring Break in this class. I’m attaching a link to that tool library here for you to download. The file is zipped so you’ll need to open the zip archive and then copy the file (BANK_TOOLS_2015+PlywoodBit.TOOLDB) to your Windows Installation and load it as was shown in the demo. Have a great Spring Break!
https://drive.google.com/file/d/0B8d3cMG0eaxfVnVZUWVKMG9iN1U/view?usp=sharing
Y Chair Drawings
We intended to collect the chair drawings for grading but most of them did not have names on them. Everyone should write their names on their drawings (front or back) and leave them in a place on your desk that will be obvious for us to find.
B Content from the Demo in the CNC Lab
Here is some of the content that was introduced in the CNC lab, but in slide form.
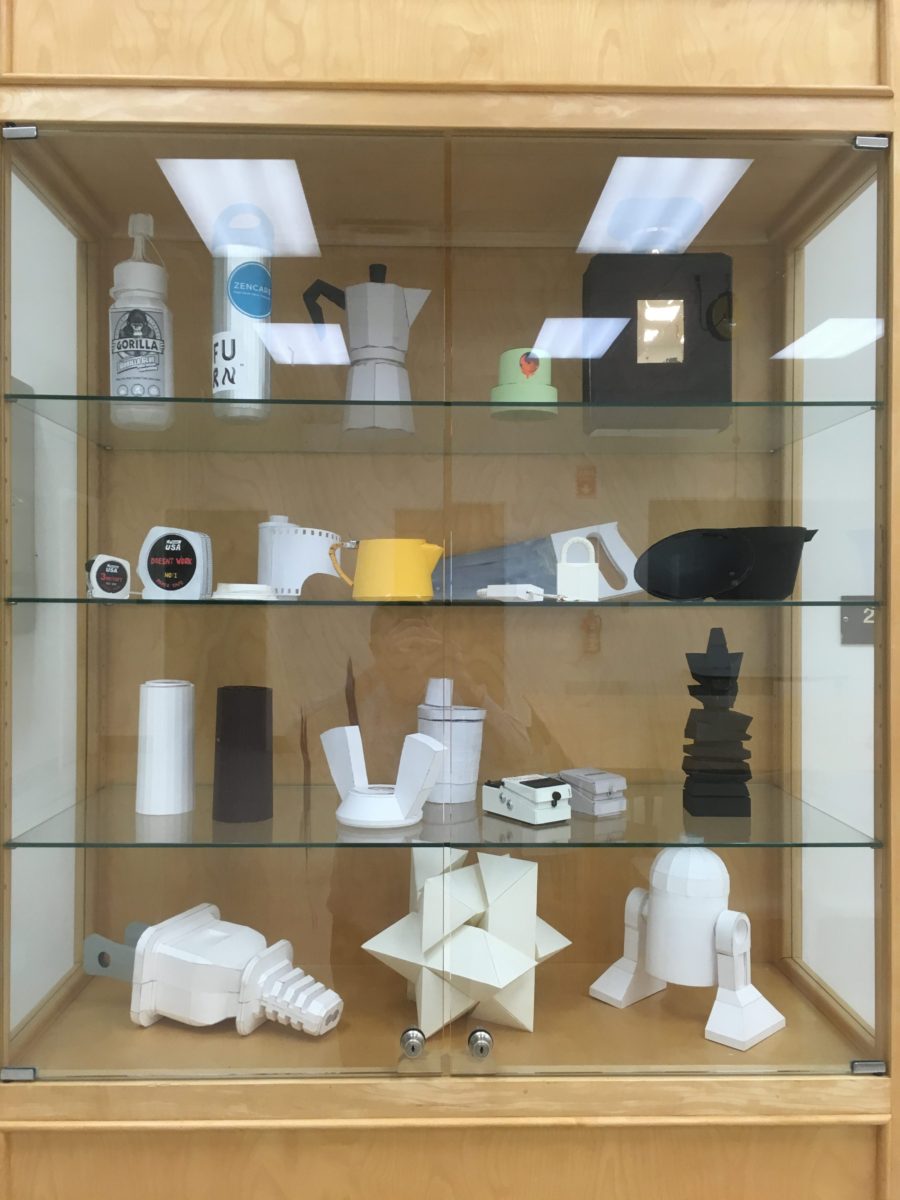
Y Great Job on the Paper Models!!
I put a bunch in the case. If for some reason you need it, get in touch or ask Marilyn to let you into the case.
B Cat Face Tutorial
Follow along to the Cat Face Tutorial here:
https://risdbankcnc.squarespace.com/introduction/
í Assignment 5
Part 1: Last chance for revisions
After spring break, the open period for revisions to any of the projects thus far will close – the glasses, chair study, and paper model project. Any revisions and improvements you make will be taken into consideration for grading purposes. If you do make revisions, make additions to your documents or folders, don’t erase the originals. The revisions should go in your personal folder as well as the shared assignment folders in google drive.
Part 2: Cat Face Tutorial
Follow along with the Cat Face Tutorial to create your own MasterCAM file.
Part 3: Name Plate – due Monday 4/3 at 9am!
Create a name plate for your self, to be executed in 1/2″ thick MDF on the CNC router. We will supply the material and will cut all of the names in one go. Some requirements:
- Students are required to draw the letters for their name plate as “single stroke” fonts
- The names will be cut with the following configuration
- contour toolpath, with compensation turned off (cutting on the center of the line)
- cut with the 1/4″ ball end cutter
- cut to a depth of 1/8″
- The outside profile will be cut with the following configuration
- contour toolpath, compensating to cut to the outside as a climb cut
- cut with the 1/2″ flat-end cutter
- cut depth of 1/2″
- stepdown of 1/4″
- four tabs at .75″ wide, .125″ thick (use Vertical Moves, NOT RAMP MOVES!!!)
- Name Plates must fit within a 9″ x 14″ rectangle
You will be required to submit a MasterCAM file and a Rhino file for this project. Use the Rhino file below as a template to fit your Name Plate within. Use the layers included in this file as follows:
- Place your name curves on the layer called “Name Curves”
- Place the outside contour on the layer called “Outer Profile Curves”
Name your Rhino and MasterCAM Files with the following convention: Firstname_Lastname_NamePlate
Place these files in your personal folder and the shared folder called “Name Plate”
Get the Template Here:
https://3d2017.christopherspecce.com/wp-content/uploads/2017/03/NamePlateTemplate.zip
The template includes sample curves for the name and outer profile. Delete these curves – don’t include them in the file you post the google drive.

Comments are closed.
Y Question about the final paper model
In an email Laura asked:
“…are these models supposed to be colored or should we bring them in as plain white paper models? If they are supposed to be colored, how realistic do the ‘textures’ have to be?”
The project brief states:
“materiality of the object must somehow be represented in the paper model”
We do not expect texture maps to applied to the patterns in Rhino, as we did with the wood and chair cane on the chair study project. Very simply, these textures can be drawn or painted onto the assembled model – we would be very excited to see this mix of computer generated patterns with a more hand-worked representation of surface, color, materials, etc. Note that we use the word “somehow” in the project brief. This is an effort to allow for plenty of flexibility, abstraction, and simplification in how this aspect of the project is treated. This can be very simple, basic, and/or subtle and does not necessarily need to be very realistic. For example, if your object was chrome, you could simply use gray or light blue paper to hint at this.
But I would say that if you are struggling, we would prefer that students prioritize form, proportion, scale and craft if sacrifices need to be made on the materiality aspect of the assignment. In other words, don’t ruin a nicely done model if you run out of time.
í Assignment 4
Part 1: Paper Model Round 2 (final)
Revise your Rhino model as needed and create a final paper model for this project. This model should be a well crafted, carefully proportioned likeness of your chosen object, demonstrating thoughtful decisions about what to include as part of the form, what to represent with graphics, and how to abstract compound curving surfaces into simple, developable surfaces. For now, focus on creating the model, but over spring break we will ask you to create another google doc with similar content to last week, so be sure that you are working in an organized fashion in Rhino as we will review the files.
Part 2: Install MasterCAM 2017
You will get an email with instructions for how to download and install MasterCAM 2017. This software will only work on Windows.
Part3: Bring Protective Eyewear to Class
There is a chance we will have a hands-on demo with the CNC router. Students will need protective eyewear to participate.
Comments are closed.
Y KNK Maxx Air for Cutting – Still working on it…
I have been working on getting the KNK Maxx Air plotter to work properly as a cutting machine for the past few days and I am hopeful that I will have it running on/by Friday evening… Most likely I will set up some time this weekend for a demo if anyone is interested and I will post instructions in PDF format. Sorry for the delay.
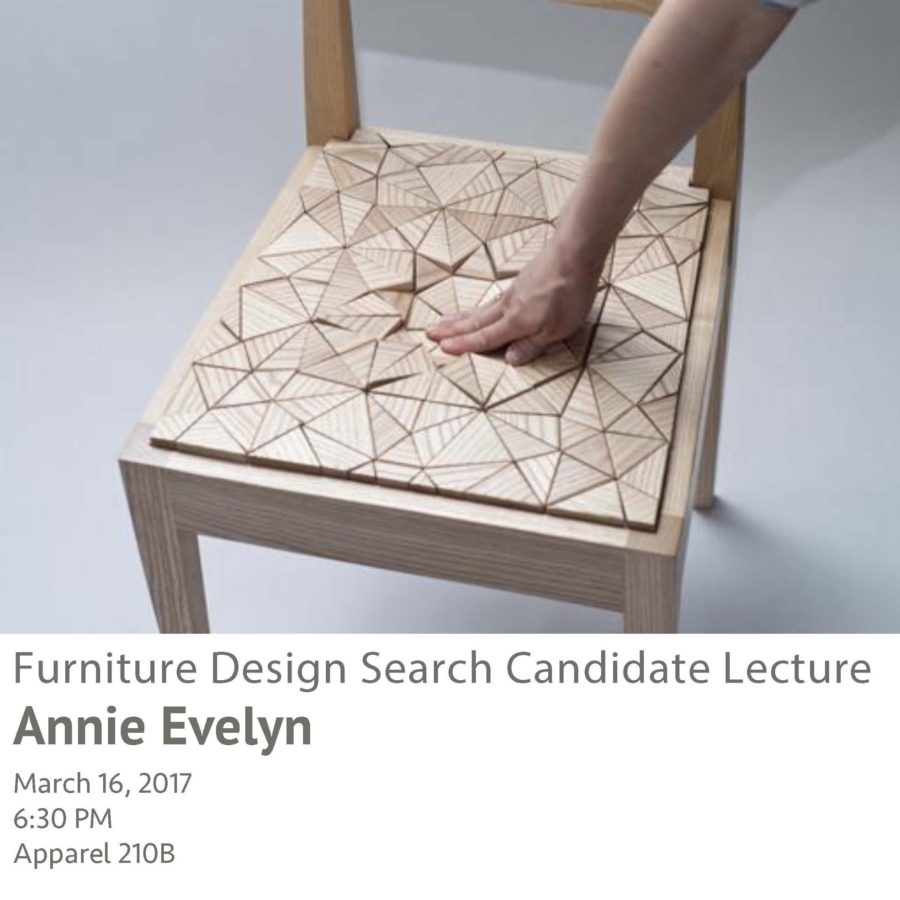
Y Annie Evelyn Lecture Thursday Night (3/15)
As we discussed, we will be grateful if you attend this lecture on Thursday in the Apparel Design Building, room 210B. You can see more of Annie’s work here:
http://annieevelyn.com/
Comments are closed.
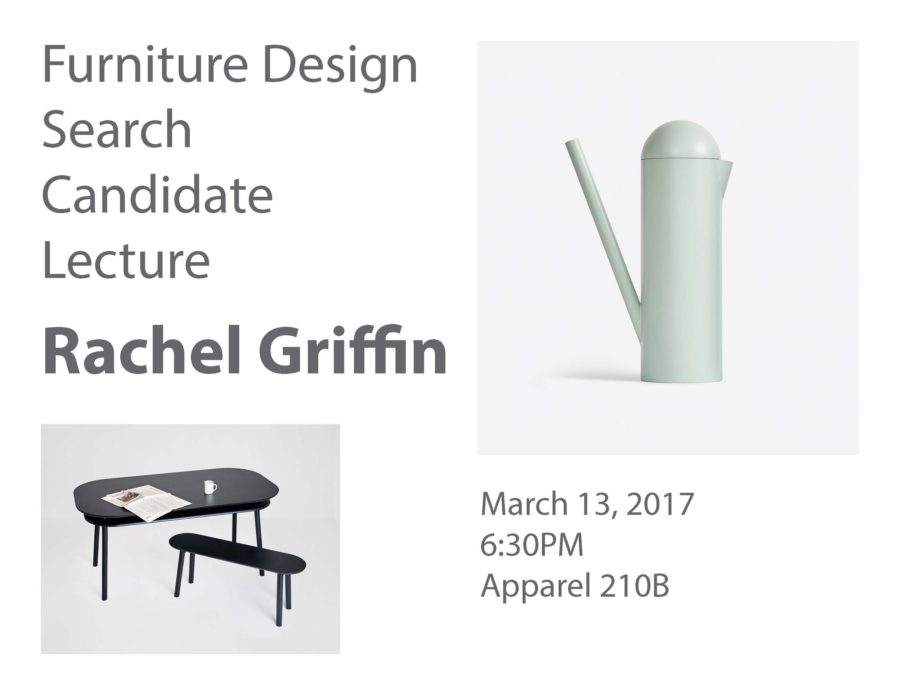
Y Rachel Griffin Lecture Monday night (3/13)
As we discussed, we will be grateful if you attend this lecture tonight. You can see more of Rachel’s work here:
http://www.earnestly.org/
Comments are closed.
í Week 4 Challenge: Toy Boat
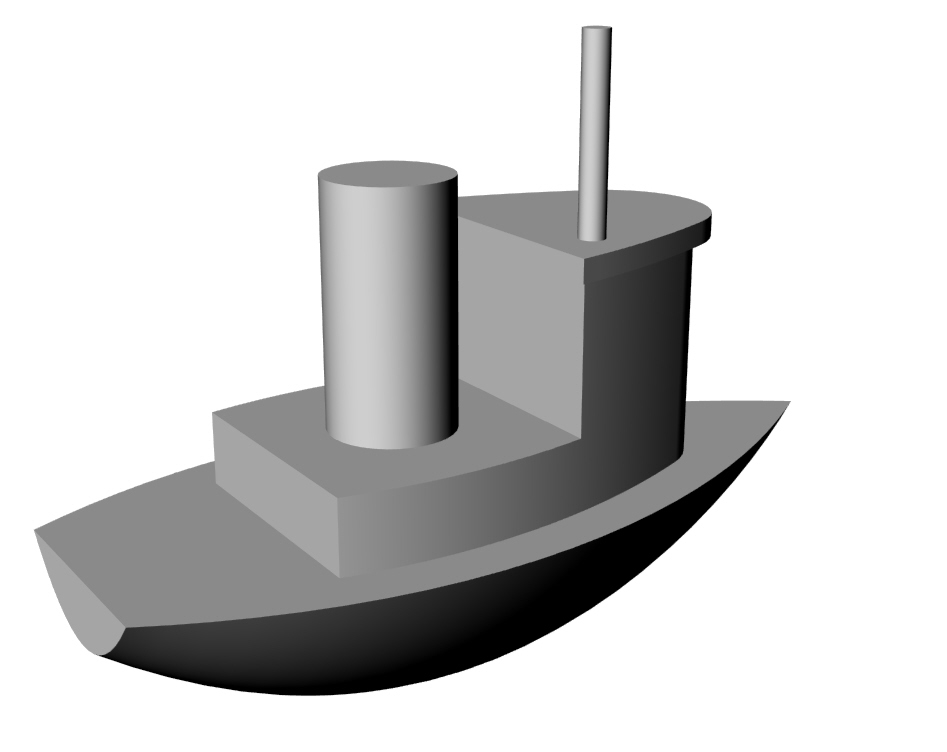
Build a model of the toy boat indicated in the orthographic views below.

Comments are closed.
B Useful SrfSeam Command
One tool we want to ensure everyone knows about is the SrfSeam command which could be very important on the paper model project.. This tool allows you to move the seam of a surface, for instance where the wrapped surface of a cylinder meets. This command won’t work on polysurfaces so you will have to explode or extract the surface you’d like to adjust. Attached are a few images of using the command to move the seam of a cylinder away from where another cylinder is bisecting it. Moving the seam will affect how the Unroll developable surface creates the pattern.
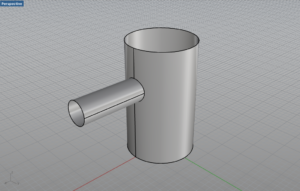


B Strange Looking Glass Rendering?
Does your rendering look like this:

This is happening because there are two surfaces occupying the same space. One that is using a glass material, the other is using the dark liquid material. The software tries to display both of them, but an interference pattern results. You will need to select the object with the glass material and turn it off. you can do this in Rhino, but if you are already in Keyshot, you can do it there as well. There are two ways to do this:
This page shows how to use the scene tree to select an object and turn it off
https://www.keyshot.com/manual/keyshot6/?section=scene-tree
But you can also delete it. From the scene tree, select the object you want to delete and then right click and select delete from the list of options (shown here):
https://www.keyshot.com/manual/keyshot6/?section=duplicating-models
In Rhino, you can also run the command SelDupAll (Edit>Select>Duplicate Objects) to find any duplicates that might be in your model.
This link provides an illustrated explanation. It’s geared towards SolidWorks users, but the concept is the same.
B Unroll Surface Video Demonstration
This video provides an in depth review of the “Unroll” command
You can download the model used in this video here:
https://3d2017.christopherspecce.com/wp-content/uploads/2017/03/UnrollVideoDemoModel.zip
B Video Review of Make2D
If you’re looking for a review of the Make2D command that was covered in class, here’s a video that provides a quick refresher. FYI – this video isn’t mine – it’s from Polyplane.com
í Assignment 3
due March 13
Part 1. Chair Study Drawing
Working from the models of the bentwood chairs that were built in the previous assignment, create a drawing. As has been stated in the project brief, this drawing must show at least one of the chairs in use, with the linework for the chair executed on the Klic-N-Kut Plotter. The aspects of the drawing that show use should be executed by hand. Your drawing must make use of the “make2d” command, and the chair or chairs must be a “primary” subject matter, but there is a plenty of freedom to approach this assignment in a variety of ways so each student can create a work that has relevance and value to their personal interests.
As we’ve discussed, the plotter can accept a variety of media and drawing tools, but paper that is too thick (heavy watercolor paper) or too thin (fine tracing paper) may be more difficult to work with as may also be the case with drawing tools that are especially sharp or wet. The drawing should be composed and laid out within Rhino, with all of the linework that will be plotted included. Keep in mind that the plotter can only process “vector” curves – pixel or raster images can not be processed by the plotter. Be sure to refer to the separate post with instructions for how to use the plotter.
Part 2. Paper Model Round 1
Working from the Paper Model project Brief:
- build a model of your object in Rhino
- translate this model into developable surfaces
- unroll the surfaces into a pattern that can be cut
- revise and modify as necessary (add tabs, etc)
- cut out this pattern in paper with the digital die cutter or the laser cutter
- assemble and finish
In the class google drive folder, put the following content into a google doc:
- rendering or screenshot of your rhino model
- screenshot in orthographic view of your cut pattern
- photo of your assembled model
name this file: FirstName_Lastname_PaperModel. Make sure this file is in the shared paper model folder as well as your personal folder.
Part 3. Install Windows
Make sure Windows is installed and working on your computer. Please get in touch if you are having problems or have questions about this
Part 4. Install MasterCAM Home Learning Edition
We will update this post with instructions for how to access and download this software, but this software is only available for Windows.
Part 5. More Revisions
You are welcome and encouraged to continue / begin revising your work for the previous assignments. This means improving the design and rendering of your glasses based on the feedback from the comments and the improving the model and renderings of the chairs. You are also encouraged to continue the discussion in the comments of the glasses assignments.
Comments are closed.
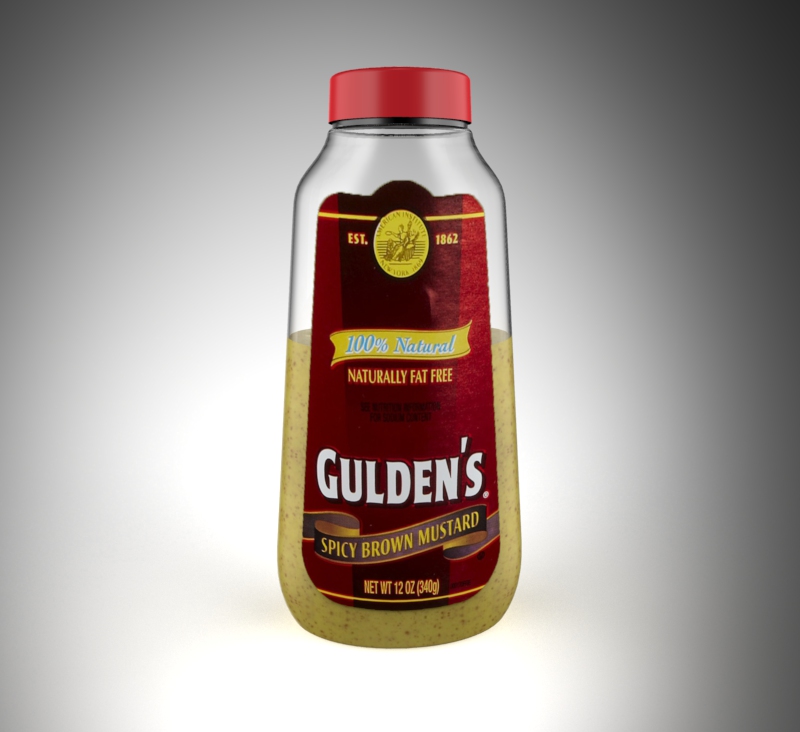
í Week 3 Exercise: Mustard Bottle Tutorial
Download the PDF file below which will cover the steps to build the mustard bottle shown below. If you get done with this early, see if you can use the images below to use as textures to create a realistic rendering of this object.
https://3d2017.christopherspecce.com/wp-content/uploads/2017/03/MustardBottleTutorial.pdf
Comments are closed.
í Week 3 Challenge 1: Pencil
Build a model of a sharpened wood “golf” pencil. Sample pencils will be distributed for inspection and measurement. First and foremost this exercise is about form, but proportions and dimensions are important too. Don’t worry about materials you can build this as if it was all one single material / piece.

Comments are closed.
( Use the Middle Mouse Button for Increased Productivity!!!!!
In both the Windows and Mac versions of Rhino you can customize the pop-up menu that appears when you click on the middle mouse button. You’ll see me do this often when I’m working in Rhino – it’s a huge productivity booster.
To customize in Windows:
Click the middle mouse button
click on the small gray bar at the top of the menu – this will “dock” the menu
remove items from the menu by holding shift as you drag them off the menu and into the workspace
add items by holding CTRL as you drag from an existing toolbar into the menu
To customize on the Mac:
http://discourse.mcneel.com/t/cant-customize-middle-mouse-button-popup-toolbar/4044
B Extrusions Aren’t Solid!?
In an email Hannah asked:
I have drawn and extruded it different ways a billion times but it wont create a solid extrusion like it will for the circular seats. The two extrusions always have space between them even though solid is checked off in the extrusion menu. I’ve tried to join the two extrusions and make a surface to go between them, and make surfaces before extruding, but nothing has worked. Do you have any idea of what isn’t working?
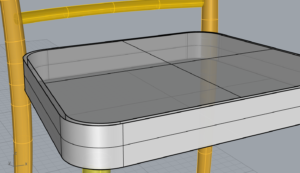
- Select one of the curves
- select the properties inspector on the right side of the rhino window – the one with two concentric circles on mac, a rainbow wheel on windows
- expand the “details” drop down on mac, on windows, click on the “details” button
- look to see if it says the curve / polycurve is “open” or “closed”
- repeat for the other curve
Comments are closed.
Y Great Opportunity for Sophomores – Deadline Extended til 3/7!
The deadline for this opportunity has been extended until Tuesday March 7.
There is a great fellowship opportunity available to sophomores and juniors, offered by Be Original (an organization that promotes authentic, as opposed to “knock-off” furniture and lighting design). From the website:
“Be Original Americas’ 7-week Summer Design Fellowship program will introduce two college students to all facets of creating innovative, high-quality products, from research, design, and manufacturing to marketing and distribution through hands-on, in-the-field learning.”
The deadline is February 28 – next Tuesday, but all you need to apply is:
- Resume or CV that emphasizes relevant experience and achievements
- Letter of Recommendation from a college professor
- Short Essay (500-700 words). Please answer all of the below questions in one MLA-formatted document
- What does original design mean to you?
- What is your favorite design and why?
- What do you see as the future of original design?
Each section of the fellowship will focus on a different aspect of the process from the perspective of Be Original Americas member companies, supplemented by visits to their showrooms, headquarters, and factories in New York City and throughout the United States. The Be Original Americas Fellowship will provide a uniquely diverse and comprehensive exposure to the top players in the industry, offering exposure to both iconic firms with global heritage and game-changing new brands. Throughout the program, discussion will focus on how each area of concentration contributes to the integrity and originality of designs that are intended to improve quality of life and foster creativity.
Be Original Americas will provide travel and lodging accommodations as this program will require travel to New York City and member company sites throughout the United States. Participants can expect to incur some costs for food and incidentals. A $3,500 grant will be awarded to each student at the successful conclusion of the program.
Applicants must be in good standing at their university (3.0 GPA or higher) and be eligible to work in the United States. Applicants must be United States citizens or legal resident aliens who reside in the United States, at least 18 years of age or older, and have a valid passport.
More info and application here:
http://www.beoriginalamericas.com/fellowship/
I’m happy to offer any help or advice to anyone wishing to apply.
Comments are closed.
( Commenting in Google Docs
Part of the homework is to comment on someone else’s project. There are several ways to do this, but all start with opening the google doc you want to comment on (duh):
- select the text you wish to comment on
- go to Insert>Comment (you can also use the shortcut command+alt+M on mac and ctrl+alt+M on mac)
- type your comment into the field that appears
- click on the comment button
or
- float the cursor along the right edge of the page near the section you want to comment on until an icon of a talk bubble with a document in it
- click on this button
- type your comment into the field that appears
- click on the comment button
As reminder, you are supposed to comment on the person whose last name is after your’s alphabetically. The last person in the order should comment on the first person. Here is a list of the class’s last name:
- Bartlett
- Brame
- Buttaci – Rincon
- Cassell
- Caycedo
- Cha
- Chen
- Cottingham
- Dekhayser
- Ford
- Gong
- Gupta
- Jaramillo
- Librizzi
- Mandel
- May
- McAllister
- Miller
- Ng
- Pratt
- Ralls
- Reina
- Shaw-Jones
- Suryanarayanan
- Walworth
- Wang
- Wei
- Zhang
- Zhu
B “History” functionality in Rhino
We didn’t look at this in class, but the “History” functionality in Rhino could be very useful as you are work on building the three bentwood chairs. This functionality will link input and output geometry. In other words, it can connect a curve (input geometry) with a pipe (output geometry) so that if the input curve is manipulated, the resulting output surface will follow this change.
More information here:
http://docs.mcneel.com/rhino/5/help/en-us/commands/history.htm
Comments are closed.
( Where to find and buy Parallels, Windows
In order to install Windows on your Mac, you will need to purchase and download Parallels (unless we have spoken to you and recommended using bootcamp, are already using bootcamp or are using a PC). You can purchase Parallels and download the free Student edition of Windows from https://risd.onthehub.com . Be sure to give yourself plenty of time for downloading and installing as the files are quite large. If you have downloaded your free copy of Windows 10 previously while at RISD, you will not see an option to get Windows as they only allow you to download the OS once. Check the bottom of this post for more information.
Once you download the Windows 10 ISO (the installer file) and Parallels, install Parallels first. It will then guide you through installing a virtual machine (where you will run Windows). You will need the ISO file on your computer or a USB thumb drive and your License key but the install should be fairly automated with Parallels.

You will find Windows under the “Microsoft” tab and Parallels under “More Software” tab.
 You should buy the Parallels Desktop 12 for Mac, not the version with the “access bundle”.
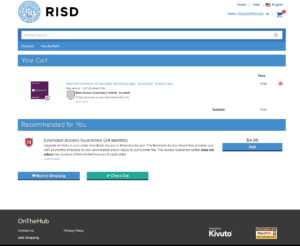 This is what you should see for windows once you add it to your cart. If you can’t find it, read below:
Can’t Find Windows on onthehub?
If you previously installed or downloaded Windows 10 from onthehub, you will need to find the email that contains your license key that was sent when you originally. If you don’t have this you’ll need to talk to OIT to retrieve it or pay for a new license. You can get the ISO file (the disk image of the installer) from OIT, another student or we will try to have Marylin have a USB drive you can check out with the file.
B Chair Cane and Wood Texture
Here are two images that can be used to simulate a caned surface as was demonstrated in class.
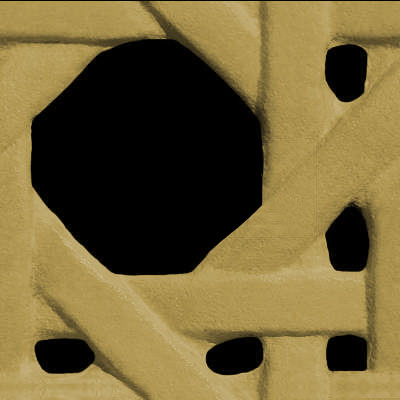

A basic review of how to do this:
- Assign the objects you want to have this texture with a “Matte Paint” material with any color (other materials will work as well, but this is a good start)
- Find this material in the list of in-use materials from the materials inspector, double click on it
- Click on the “Textures” Tab
- Assign the black and tan image to the “Color” texture option
- Assign the black and white image to the “Opacity” texture option
- Make sure the option for “sync” is turned on from the bottom of the textures properties
- Adjust the scale as needed with the slider or by entering a number in the field associated with the scale slider
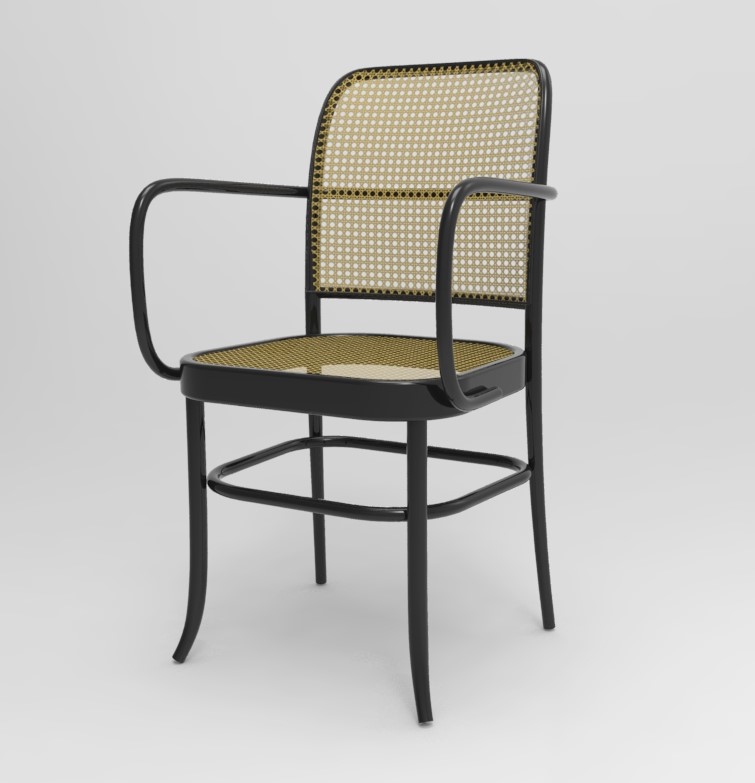
And here is a wood texture you can use
í Assignment 2
1. Comment on Someone else’s project
A. Due March 3
In response to their work on the drinking glasses part of Assignment 1, write a very brief statement commenting on the work of the classmate whose last name follows your alphabetically (the last person in this order should comment on the first person). Describe at least one positive and one negative aspect of their design, but also make specific suggestions for how their rendering can be improved. This comment is required, you are also welcome and encouraged to comment on anyone’s work. Use Google Doc’s commenting feature to do this.
2. Improve Your Post for Assignment 1
Due March 6
If your post from the first assignment had any problems, or if suggestions were made that could improve your design or rendering, you have the chance to go back and make improvements. Technically this is not required, but the improved submission will be considered for grading purposes, should you choose to revise. If you choose to improve your work, modify your document, adding the new content so we can see the improvements in relation to the original content. Don’t delete the original work.
3. Chair Study: Models and Rendering.
Due March 6
Working from the brief for the Chair Study project, you should create the following content:
Rhino File
- Build a model of each chair.
- Begin by drawing 3D curves that faithfully capture the proportions and scale of the chairs.
- Most of the bentwood components should be built with the pipe tool, with the majority of remaining surfaces built as extrusions or surfaces from planar curves (“planarsrf” command).
- Build all chairs in a single Rhino file.
- Place each chair on its own set of layers
- Use nesting layers to place each part of the chair on a separate layer
- Build each chair to have a consistent relationship with the origin (if one is centered over the origin, make all of them centered, for example)
- Keep all important curves on layers to facilitate organization and management
Rendering
- Using Keyshot, create a single rendering of all three chairs composed and arranged into a photographic scene in order to create an interesting image.
- Save your rendering in JPG format. The image you post should be 800 pixels wide.
Don’t worry about the drawing aspect of this project – that will come next week.
Put your rendering in your personal google drive folder and the “chair rendering folder”. Name this file “Firstname_Lastname_Chair”.
4. Install Windows
Instructions for obtaining Windows and Parallels will be covered in a separate post, but you should download and install the virtualization software (parallels) and Windows.
5. Paper Model Selections
Select and bring in several objects for consideration to use in the next project, Paper Model.
Comments are closed.
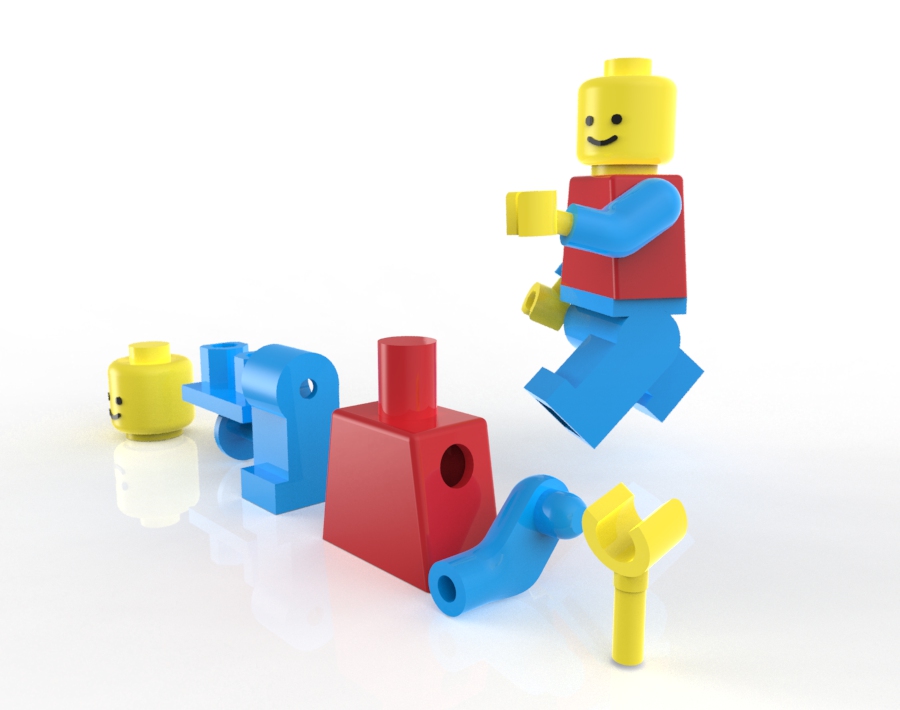
í Week 2 Challenge Part 3: Lego Figure
Using this Rhino File, assemble the Lego figure in the poses indicated this document.
Keep the original model, and make a new layer (or set of layers) for each pose.
Comments are closed.
í Week 2 Challenge Part 2: Drawing in 3D
Fit a control point curve in the tubes included in this model. Use the exact number of points indicated by the layer name.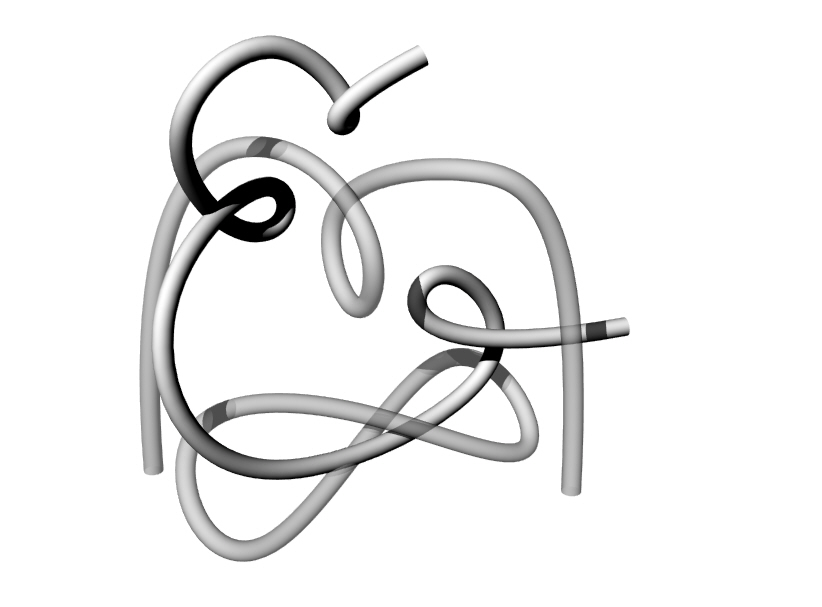
Comments are closed.
í Week 2 Challenge Part 1: Tracing
Use the image below to trace the figures shown in red. Each figure indicates the drawing tool you should use and two of them have specific instructions about the number of points your drawing should have.
Comments are closed.
Y If you haven’t completed the Hardware survey, please do so
Here’s a link to the survey. This information will be helpful for us as we start working with Windows in the next few weeks.
https://goo.gl/forms/KfpqKzrWKgozMFBV2
Comments are closed.
Y Questions about Control Points and Clarifying the Assignment’s Single Revolve Constraint
In an email, Laura asked:
“…in the process of revolving my curves about a million Control points were added to the original revolve curves for no apparent reason….I’ve been trying the fix the problem for ages now but nothing’s working. “
Most likely the “new” points appeared after joining separate curves together into a “polycurve”. It is necessary for Rhino to add control points in many situations when curves are joined We will talk about why soon). If these polycurves are exploded, you will find that the individual curves should return the original control point count. Also, when curves are offset, the offset curve will be more complex (have more points) in order to satisfy the conditions of the offset (dimension, tolerance). That is why the assignment requires that the curves be exploded before taking the screen shot. It’s OK if offset curves are complex, we can decipher what has happened in that situation.
“…by one revolve do you mean one revolve axis or one revolve curve?”
When we say a “single revolve” it just means that one can only use a “full circle” (360 degree) revolve to build each glass. The curve used to revolve the glasses can be a single, simple curve, but most likely it will need to comprised of several curves joined into a polycurve, as is demonstrated in the video. It is permissible to have two totally separate curves, if the intention was to make a bubble within the base of the glass, for example. But this curve would need to use the same axis as the other curves. In that case, both sets of curves could still be formed at once. If the design somehow incorporated two revolves, using different axis, then that would go against the constraints for this project.
Comments are closed.
Y Keyshot in the Computer Lab
I just did some work in the computer lab to make sure Keyshot is installed on the iMacs in the computer lab. It is on both the windows and mac installs for these machines. Rhino is also installed on both OS’s.
If you find one of these computers running windows and you want to use the Mac OS, you can restart the computer, hold the “alt” key as the screen goes black, then select “MacHD” from the options of two drives to boot from. The reverse situation works to (from Windows to Mac).
Comments are closed.
Y Trouble Downloading Windows
Sruti sent an email saying that she was having trouble getting windows from RISD On The Hub. We are aware of this problem and I am going to check in with OIT about this. You don’t need to have Windows for next week, so don’t worry about this until we get this resolved.
Comments are closed.
Y Rhino is in stock at the RISD store
I got a message from the RISD store that Rhino is back in stock. This is the place to get Rhino – It’s much cheaper here than anywhere else. They have limited copies for now, and other students will be shopping for this as well. More copies are on the way though.
Comments are closed.
( Apple Magic Mouse + Rhino
If you have the Apple Magic Mouse and are using it with Rhino, you might find there are some things about it that are not ideal. There are a couple of tricks that might improve the behavior the mouse that you can try setting up.
If the virtual “scroll” is too fast, go to Rhino > Preferences > View > Zoom, and change to Scale factor value to a value closer to 1 to slow down the zooming speed.
You can also try the third party mouse control application called Magic Prefs that allows you to make more detailed adjustments to the mouse settings than the System Preferences panel allows.
( Where to get Rhino and Keyshot
Rhino will be available from the RISD store on Thursday (they’re sold out but a new shipment is on the way). It’s in one of the locked cases in the back, so you will need to ask for it. But be sure to get the right OS. With a student ID, it should be $80. Regular student licenses are more expensive ($195), so don’t get it anywhere else but from the RISD store.
Here’s a link to where you can purchase the educational license of Keyshot:
https://buy.keyshot.com/products/keyshot-hd-animation-education-version
You will need to supply proof of educational status, and they approve the purchase during business hours (M-F, 9am -6pm PST) so you’ll need to keep that in mind.
On Windows you can get a plugin for Rhino that lets you work between Keyshot and Rhino a little bit more easily. Get it here:
https://www.keyshot.com/downloads/plugins/
In the meantime, you can use the trial version:
https://www.keyshot.com/try/
B Navigating the view of your workspace
By now I am hopeful that you all understand the basics of navigating the view of your model with the various functions we discussed in class.
Zoom (remember, zooming focuses on the cursor position)
- CTRL (windows) or Command (mac) + hold right click and drag forward (in) and backward (out)
- scroll wheel up and down
- pinch on trackpad (mac). You should use a mouse though.
Pan
- shift + hold right click and drag
- two finger drag on trackpad. Again, use a mouse.
Rotate (aka tumble, orbit)
- hold right click and drag
- two finger hold click and drag on trackpad. But of course, you will be using a mouse
Sometimes when you are viewing your model, you can get lost. This can happen if you zoom in or out to far or your rotate away from your object. When this happens, you can Zoom the “Extents” of your workspace. This means that the “camera” will reposition to display all of the objects contained in your workspace. To do this you can:
- click on the “ZoomExtents” button from the toolbar (looks like a magnifying glass surrounded by four triangles
- from the drop down menu select View>Zoom>Zoom Extents
- Type the command Zoom”, then pick the option “Extents”
Another thing that sometimes happen is you either can’t zoom in, or out any further than you are, or when you rotate the view, your object doesn’t stay centered in the viewport. This happens when the “focus” of the “camera” is not where you want it to be. A useful command to remedy this is Zoom Target. This allows you to select a point to recenter the focus of the camera. To do this you can:
- click on the “Zoom Target” button from the toolbar (it is the right click function of the “Zoom” button, which looks like a magnifying glass that is partially over a square drawn with dotted lines
- from the drop down menu select View>Zoom>Zoom Target
- type the command “Zoom”, then pick the option “Target”
Once the command is running you will be prompted to select a new target. Click where you want your target to be placed, then you can draw a rectangle to establish the extents of the view.
Comments are closed.
B List of the tools / commands introduced in the first class
Comments are closed.
Y More about Rhino Licensing
If you are wondering: “Can I keep my Rhino license and move it to a new computer when I get one? Or will I have to buy a completely new license?”
This is a great question. You own the Rhino license and it does not expire and is not tied to a single installation or machine. The terms of licensing agreement are the same for Windows or Mac in this regard. So, the answer to this question is:
If you get a new computer, you will certainly be able to install Rhino on it. You will not need to buy a new license when you switch. Furthermore, you will be able to keep the license on your old computer, or if you get a second computer, you can install it on the two computers you own.
Remember that the license is per OS though. You need a separate license for Mac and Windows.
Here is the official language from Rhino:
The license agreement allows you to install your Rhino on all of the computers you directly control, provided you can show your Rhino will only be running on one computer at a time. Rhino is licensed on a “simultaneous use” basis and not on a “per installation” basis.
Here is the detail from the EULA:
“Robert McNeel & Associates grants you the non-exclusive license to use the Software on any computers owned by you so long as the number of simultaneous users does not exceed the number of licenses you own.”
-
You can not “loan” your Rhino to a friend or family member.
- Educational Licenses are not transferrable / saleable
Rhino is a really excellent, very valuable piece of software and students will be expected to comply with the licensing agreement of the software and to run legitimate, legally licensed copies of the software. Please understand how much value software provides and the significant discount you have available to you. If you are having a hard time with this, think about how much value you get from software and how much it costs compared to other tools, materials, and supplies you use in your work.
Comments are closed.
( Making Mac Rhino Look More Like Windows Rhino
Many of the videos we post are recorded on a Windows computer. Some of you might prefer your setup to look more like the Windows version of Rhino. Here’s how Rhino approaches this:
“By default, Rhino for Mac presumes you are not coming from Rhino for Windows. If you would like to see Windows-esque toolbars, navigate to Rhinoceros > Preferences > Themes and select Rhino for Windows. You will need to start a new modeling window for these changes to take effect.”
See more about the interface differences between Mac and Windows here:
B A review of Rhino’s interface and Geometry Types
If you need a refresher, here is a review of the Rhino interface.
And here is a review of the various kinds of geometry you can work with in Rhino.
B How to make a screenshot
The drinking glass assignment requires that you take a screen shot of your revolve curves. Here’s how to do this:
Windows and mac:
Make sure the viewport you want to capture is active, then run the command – ViewCaptureToFile.
Also FYI:
the Mac OS has an easy to use screen capture tool built in. Press Shift+Command+4 and a cursor will appear that allows you drag an area to capture as a screen shot. You should hear a shutter sound, this means that the image is saved to your desktop.
Windows has a built in app called “Snipping Tool” that can be used for screen shots.
Comments are closed.
B More information on the “PictureFrame” command
If you’ve seen Part 1 of the Drinking Glasses Demo videos, then you’ve gotten a taste of what the PictureFrame command can do. This is a great tool and I use it all of the time if I need to bring in an image to use as an underlay for tracing, modeling, reverse engineering, etc, etc. Here is a more in-depth look at how it works.
B Drinking Glass Demo Part 3: Rendering with Keyshot
Part 3: This Video demonstrates how to do a basic rendering with Keyshot, including how to set up the kinds of materials you may want to use for this project.
B Drinking Glass Demo Part 2: Volume Analysis
Part 2: How to measure the volume of your glass.
Commands used in this video:
- box
- booleansplit
- volume
B Drinking Glass Demo Part 1: Drawing and Revolving
Part 1: A review of the drawing and modeling techniques required to complete the drinking glass assignment.
Commands used in this video:
- Pictureframe
- Curve (control point curve)
- fillet
- BlendCRV
- Scale1D
- join
- explode
- revolve (full circle)
B How to use the trim, split, join, explode, and cap commands
An introduction to several useful editing commands in Rhino.
The commands covered in this video are:
Trim
Split
Join
Explode
Cap
Fillet (with radius set to a value of 0)
í Assignment 1
Part 1: Software
Purchase and install Rhino and Keyshot. Purchasing this software is not optional.
Part 2: Tutorials
Complete the “Pull Toy” and “Flashlight” tutorials from the Rhino 5 user’s guide.
Part 3: Glasses
Working from the brief for Project 1: Glasses, create the following content:
1. Description
Write a brief text description of your design proposal. Your description must include the following content:
- 1 sentence profile of the museum, include the name of the museum, location of the museum, area(s) of focus (for example: contemporary art, civil war history, New England wildlife, etc)
- why your design is appropriate for this context
- 3 descriptive adjectives that characterize the aesthetic qualities of your designs
2. Development Sketches
Sketching is versatile tool for a designer, and is particularly helpful to resolve forms and solve modeling challenges when working with 3D CAD. Use sketching to develop the initial concept and form of your glasses’ design. Sketch on 8.5” x 11” sheets of paper. Scan or take legible photographs of the sketch(es) that guided your modeling. We recommend using Photoshop to clean up this image. Bring your sketches to class next week.
3. Rhino File
Your Rhino file must satisfy the following criteria:
- Each glass must be modeled solely with a single revolve
- Each glass must be a solid
- Place each glass on its own layer and name the layer accordingly
- Place each revolve curve on a sub-layer for each glass and name the layer accordingly
- Any construction geometry worth saving should be placed on a layer(s) with clear, logical naming and organizational strategy
- Align the revolve axis of each glass with the origin’s (0,0,0 point) Z-axis, with the base of the glasses resting on the Top CPlane
Put this file in your personal folder on the Google Drive. Name this file Lastname_Glasses.3dm
4. Rendering
Include 2 Renderings of your glasses:
- Front orthographic view showing all glasses
- Perspective view showing all glasses
Your renderings must satisfy the following criteria:
- horizontally align the glasses so they form a neat row, arranged in the following order (from left to right): wine glass, pint glass, water glass, juice glass
- leave equal spacing between each glass
- save your renderings in JPG format, with a maximum width of 800 pixels
5. Screenshot
Include a screenshot of your revolve curves with the control points turned on. Your screenshot must satisfy the following criteria:
- compose this screenshot in an orthographic view
- explode any joined curves
- horizontally align the revolve curves so they form a neat row, arranged in the following order (from left to right): wine glass, pint glass, water glass, juice glass
- leave equal spacing between each revolve curve
- save your screenshot in JPG format, with a maximum width of 800 pixels
6. Google Doc
Create a google doc that includes all of the content listed above, in the order indicated below:
- Orthographic Rendering
- Descriptive Paragraph
- Perspective Renderings
- Screenshot of Curves
- Image(s) of Preliminary Sketch(es)
Save this document in your personal folder on the Google Drive, and copy it to the glasses assignment folder. To do this use the ‘move to’ option when right clicking on the file, navigate to the Glasses Assignment folder and hold down the option/ctrl key to enable the ‘add here” function. This is how many assignments will be collected. Name this file Lastname_Glasses.
Comments are closed.
í Week 1 Exercises
Download this ZIP file.
Paper versions of some handouts will be distributed for your convenience.
1. Transforming Exercise
a. Follow the directions in the PDF called “TransformExercise”. Work in the Rhino file named “TransformExercises”, it contains all of the geometry you will need, with each problem on separate layers. Place your work on the corresponding layer as you go, as necessary.
2. Drawing Exercise
a. Trace the 3 objects shown in the Rhino file named “TracingExercise” using the polyline and control point curve tools.
b. Recreate the geometry indicated in the PDF called “PrecisionDrawing+RevolveExercise”.
3. Modeling Exercise
a. Recreate the revolved solid shown in problem 2b.
Comments are closed.
Y Welcome
Welcome to the website of Drawing for Furniture: 3D, a class in the Department of Furniture Design at the Rhode Island School of Design.
í Assignment 11 (updated)
Part 1: Plywood Object
Finish and assemble your plywood object. This project will be the subject of the final critique, next week on May 15.
Part 2A: Surface Driven Toolpaths
Follow along with the tutorial to create toolpaths for a simple paneled surface. You can download the Rhino file used in the demonstration below:
https://3d2017.christopherspecce.com/wp-content/uploads/2017/05/PlusPanel.zip
Part 2B: 2 Sided Surface Driven Toolpaths
Follow along with the demonstration below to create a “Flip Mill” series of toolpaths for your spoon.
Make two screenshots of the completed “verify” for both Machine Groups from MasterCAM: one showing the top, one showing the bottom. Create a new folder called “CAM” in your folder for “Spoon” project on the shared google drive. Place these two screenshots and your MasterCAM file in this new sub-folder. Name your files so we can easily identify you as the author and know which project this is for.
f Chris
í Assignment 10
Part 1. MasterCAM
If you don’t have your MasterCAM file done yet, we might not be able to get your part cut on time. Get this file done!!
Part 2: Spoon Modeling
Follow along with the video tutorial below and build the spoon shown.
Using the modeling strategy demonstrated in this video, build a new spoon of your own creation. Because you are to use the same strategy as was demonstrated, there is a limit to how different your design can be – proportions and dimensions can change, the cross sections can vary, etc, but you should not need to develop new techniques to build your design. The purpose of this exercise is to gain experience building a complex object like this, but with guidance to ensure the modeling strategy is sound.
Work in layers to organize your model, saving curves, and other construction geometry in a logical, organized fashion. Create a rendering with Keyshot of your model showing several instances of your design arranged into a composition. You should arrange the numerous instances of your spoon in Rhino, then bring it into Keyshot for rendering.
Upload your model and rendering to the shared google folder in the “Spoon” folder. Create a new folder for yourself in this shared folder. Name your files so that it is evident to us who you are and what project this is.
f Chris
í Week 10 Challenge: Metal Spoon
Build a model of the metal spoon that has been distributed in class. Orthographic top and side view images of the spoon are provided for your convenience below.


í Assignment 9
Part 1: MasterCAM
Make any necessary modifications to your Rhino file as needed to facilitate the completion and perfection of your MasterCAM file for the Plywood Object Project. You final MasterCAM file should go in folder called “Final” within your personal folder for the Plywood Object Project. Sign up for a time to cut your project on the CNC machine. This would also be a good time to consider finishing options.
Part 2: Make Up Work
If you are missing any work, this is a good week to make sure you are all caught up. Make sure your work is following the assignment submission criteria and includes all of the deliverables.
f Chris
í Week 9 Challenge: Y Branch
Build the object shown below. The Rhino file available here has curves you can use as a reference to build with / from.
https://3d2017.christopherspecce.com/wp-content/uploads/2017/04/Y-Branch-Challenge2017.zip

f Chris
í Assignment 8
Model Refinements and MasterCAM
1. Make any necessary revisions or refinements to your model so the design is completely finalized.
2. Optimize your cut pattern, contours, and joinery for production on the CNC router with a 15/32″ diameter cutting tool.
3. Create a MasterCAM for your project. Some things to keep in mind:
- you can only use three toolpath types for this project
- contour
- drill
- capture operations with the same settings in a single operation (hypothetical example: all pockets that cut halfway through should be in the same operation, all contours that cut on center all of the way through should be in one operation, etc, etc.
- leave at least a 1/2 margin on the edge of your sheet
- tabs should be set to VERTICAL MOVES (NOT ramp moves) with a thickness of .125″ and a width of .75″
- for drilling operations, set the spindle speed to 6,000 rpm and the plunge rate to 15 ipm
Use this Rhino file as a template as a reference for how your model should be situated relative to zero and the X,Y axes.
Create a new folder called Phase 3 in your folder in the “Plywood Object” folder on the shared google drive. Put your final Rhino file and your MasterCAM file in this folder. If your files (especially MasterCAM) are not uploaded by the next class (April 24, 2017), we can not guarantee your project will be cut on time. Make sure your Rhino file uses layers to organize all of the various elements and iterations in your file. This will be taken into consideration for grading purposes.
f Chris
í Week 8 Challenge: X
Working from the provided Rhino file, build the form shown below (do not use the patch tool!)

Orthographic Views:

f Chris
í Assignment 7
Revise and refine your Plywood Furniture Object designs as was discussed during the reviews in class. This phase of this project is to finalize the design, resolving issues related to form, dimensions, structure and joinery. For some of you, this means more incremental improvements, others will require more drastic reworking of your design. Regardless, after this phase of the project, we will be working with MasterCAM to create toolpaths for the CNC machine. Students should finalize their design so that the MasterCAM phase will be focused on optimizing for machining (as was discussed in class) and not on design.
For next week, you will be required to create another model of your design. We have discussed the requirements based on student feedback and have decided that models can be 1:2 scale models or full scale, but the material thickness should be scaled appropriately. If you decide to make a 1:1 model, you should use 1/2″ foam core.
If your design does not require major revisions, you are encouraged to begin developing strategies for how you will deal with the rounded terminals associated with cutting on the router. As was shown in class, creating “I” shaped mortises and tenons with cleared out corners is an advisable way to deal with this. If your design is fairly well resolved, you can try to include these features in your next model.
In your folder within the plywood object folder in the class Google Drive, create a sub-folder for last week’s assignment called “Phase 1”. Create a second sub-folder called “Phase 2”. Create the following files and put them in this folder for this week:
- a photo of your second scale model named “FirstnameLastname_PlywoodScaleModel2.jpg”
- a screenshot or rendering of your rhino model named “FirstnameLastname_PlywoodModelRendering2.jpg”
- and an image of your nesting scheme for the parts named “FirstnameLastname_PlywoodNesting2.jpg”
f Chris
í Assignment 6
Part 1: Chair Exercise
Finish the chair exercise that was started in class. Be sure to post a rendering to the class folder (both in your personal folder and the group folder).
Part 2: Plywood Furniture
Working from the Plywood Furniture project brief, make a 1:2 scale model of your design. Use a material that is properly scaled (1/4″ thick) for the production of your model. You are welcome to use the laser cutter for this project, but be aware that only certain materials can be cut with this machine.
Create a folder in the shared google drive with your name and place in that folder:
- a photo of your scale model named “FirstnameLastname_PlywoodScaleModel.jpg”
- a screenshot or rendering of your rhino model named “FirstnameLastname_PlywoodModelRendering.jpg”
- and an image of your nesting scheme for the parts named “FirstnameLastname_PlywoodNesting.jpg”
f Chris
í Week 6 Exercise: Chair Modeling
Create several chair models, each one using the following commands as the primary (if not exclusive) method for creating the form:
- Revolve
- Extrude
- loft
- Sweep1
- Sweep2
- NetworkSrf
Put each model on a layer in the same Rhino file. Using Keyshot, create a rendering of the 5 chairs in one image. Post this image to the shared google drive. Name this file: FirstnameLastname_6Chairs.jpg
f Chris
í Week 6 Challenge: Torqued Ring
Using the Rhino file provided below as a starting point, build the object shown below, paying attention to the transition between surfaces.
https://3d2017.christopherspecce.com/wp-content/uploads/2017/04/TorquedRing.zip

f Chris
í Assignment 5
Part 1: Last chance for revisions
After spring break, the open period for revisions to any of the projects thus far will close – the glasses, chair study, and paper model project. Any revisions and improvements you make will be taken into consideration for grading purposes. If you do make revisions, make additions to your documents or folders, don’t erase the originals. The revisions should go in your personal folder as well as the shared assignment folders in google drive.
Part 2: Cat Face Tutorial
Follow along with the Cat Face Tutorial to create your own MasterCAM file.
Part 3: Name Plate – due Monday 4/3 at 9am!
Create a name plate for your self, to be executed in 1/2″ thick MDF on the CNC router. We will supply the material and will cut all of the names in one go. Some requirements:
- Students are required to draw the letters for their name plate as “single stroke” fonts
- The names will be cut with the following configuration
- contour toolpath, with compensation turned off (cutting on the center of the line)
- cut with the 1/4″ ball end cutter
- cut to a depth of 1/8″
- The outside profile will be cut with the following configuration
- contour toolpath, compensating to cut to the outside as a climb cut
- cut with the 1/2″ flat-end cutter
- cut depth of 1/2″
- stepdown of 1/4″
- four tabs at .75″ wide, .125″ thick (use Vertical Moves, NOT RAMP MOVES!!!)
- Name Plates must fit within a 9″ x 14″ rectangle
You will be required to submit a MasterCAM file and a Rhino file for this project. Use the Rhino file below as a template to fit your Name Plate within. Use the layers included in this file as follows:
- Place your name curves on the layer called “Name Curves”
- Place the outside contour on the layer called “Outer Profile Curves”
Name your Rhino and MasterCAM Files with the following convention: Firstname_Lastname_NamePlate
Place these files in your personal folder and the shared folder called “Name Plate”
Get the Template Here:
https://3d2017.christopherspecce.com/wp-content/uploads/2017/03/NamePlateTemplate.zip
The template includes sample curves for the name and outer profile. Delete these curves – don’t include them in the file you post the google drive.

f Chris
í Assignment 4
Part 1: Paper Model Round 2 (final)
Revise your Rhino model as needed and create a final paper model for this project. This model should be a well crafted, carefully proportioned likeness of your chosen object, demonstrating thoughtful decisions about what to include as part of the form, what to represent with graphics, and how to abstract compound curving surfaces into simple, developable surfaces. For now, focus on creating the model, but over spring break we will ask you to create another google doc with similar content to last week, so be sure that you are working in an organized fashion in Rhino as we will review the files.
Part 2: Install MasterCAM 2017
You will get an email with instructions for how to download and install MasterCAM 2017. This software will only work on Windows.
Part3: Bring Protective Eyewear to Class
There is a chance we will have a hands-on demo with the CNC router. Students will need protective eyewear to participate.
f Chris
í Week 4 Challenge: Toy Boat
í Assignment 3
due March 13
Part 1. Chair Study Drawing
Working from the models of the bentwood chairs that were built in the previous assignment, create a drawing. As has been stated in the project brief, this drawing must show at least one of the chairs in use, with the linework for the chair executed on the Klic-N-Kut Plotter. The aspects of the drawing that show use should be executed by hand. Your drawing must make use of the “make2d” command, and the chair or chairs must be a “primary” subject matter, but there is a plenty of freedom to approach this assignment in a variety of ways so each student can create a work that has relevance and value to their personal interests.
As we’ve discussed, the plotter can accept a variety of media and drawing tools, but paper that is too thick (heavy watercolor paper) or too thin (fine tracing paper) may be more difficult to work with as may also be the case with drawing tools that are especially sharp or wet. The drawing should be composed and laid out within Rhino, with all of the linework that will be plotted included. Keep in mind that the plotter can only process “vector” curves – pixel or raster images can not be processed by the plotter. Be sure to refer to the separate post with instructions for how to use the plotter.
Part 2. Paper Model Round 1
Working from the Paper Model project Brief:
- build a model of your object in Rhino
- translate this model into developable surfaces
- unroll the surfaces into a pattern that can be cut
- revise and modify as necessary (add tabs, etc)
- cut out this pattern in paper with the digital die cutter or the laser cutter
- assemble and finish
In the class google drive folder, put the following content into a google doc:
- rendering or screenshot of your rhino model
- screenshot in orthographic view of your cut pattern
- photo of your assembled model
name this file: FirstName_Lastname_PaperModel. Make sure this file is in the shared paper model folder as well as your personal folder.
Part 3. Install Windows
Make sure Windows is installed and working on your computer. Please get in touch if you are having problems or have questions about this
Part 4. Install MasterCAM Home Learning Edition
We will update this post with instructions for how to access and download this software, but this software is only available for Windows.
Part 5. More Revisions
You are welcome and encouraged to continue / begin revising your work for the previous assignments. This means improving the design and rendering of your glasses based on the feedback from the comments and the improving the model and renderings of the chairs. You are also encouraged to continue the discussion in the comments of the glasses assignments.
f Chris
í Week 3 Exercise: Mustard Bottle Tutorial
Download the PDF file below which will cover the steps to build the mustard bottle shown below. If you get done with this early, see if you can use the images below to use as textures to create a realistic rendering of this object.
https://3d2017.christopherspecce.com/wp-content/uploads/2017/03/MustardBottleTutorial.pdf

f Chris
í Week 3 Challenge 1: Pencil
Build a model of a sharpened wood “golf” pencil. Sample pencils will be distributed for inspection and measurement. First and foremost this exercise is about form, but proportions and dimensions are important too. Don’t worry about materials you can build this as if it was all one single material / piece.

f Chris
í Assignment 2
1. Comment on Someone else’s project
A. Due March 3
In response to their work on the drinking glasses part of Assignment 1, write a very brief statement commenting on the work of the classmate whose last name follows your alphabetically (the last person in this order should comment on the first person). Describe at least one positive and one negative aspect of their design, but also make specific suggestions for how their rendering can be improved. This comment is required, you are also welcome and encouraged to comment on anyone’s work. Use Google Doc’s commenting feature to do this.
2. Improve Your Post for Assignment 1
Due March 6
If your post from the first assignment had any problems, or if suggestions were made that could improve your design or rendering, you have the chance to go back and make improvements. Technically this is not required, but the improved submission will be considered for grading purposes, should you choose to revise. If you choose to improve your work, modify your document, adding the new content so we can see the improvements in relation to the original content. Don’t delete the original work.
3. Chair Study: Models and Rendering.
Due March 6
Working from the brief for the Chair Study project, you should create the following content:
Rhino File
- Build a model of each chair.
- Begin by drawing 3D curves that faithfully capture the proportions and scale of the chairs.
- Most of the bentwood components should be built with the pipe tool, with the majority of remaining surfaces built as extrusions or surfaces from planar curves (“planarsrf” command).
- Build all chairs in a single Rhino file.
- Place each chair on its own set of layers
- Use nesting layers to place each part of the chair on a separate layer
- Build each chair to have a consistent relationship with the origin (if one is centered over the origin, make all of them centered, for example)
- Keep all important curves on layers to facilitate organization and management
Rendering
- Using Keyshot, create a single rendering of all three chairs composed and arranged into a photographic scene in order to create an interesting image.
- Save your rendering in JPG format. The image you post should be 800 pixels wide.
Don’t worry about the drawing aspect of this project – that will come next week.
Put your rendering in your personal google drive folder and the “chair rendering folder”. Name this file “Firstname_Lastname_Chair”.
4. Install Windows
Instructions for obtaining Windows and Parallels will be covered in a separate post, but you should download and install the virtualization software (parallels) and Windows.
5. Paper Model Selections
Select and bring in several objects for consideration to use in the next project, Paper Model.
f Chris
í Week 2 Challenge Part 3: Lego Figure
Using this Rhino File, assemble the Lego figure in the poses indicated this document.
Keep the original model, and make a new layer (or set of layers) for each pose.

f Chris
í Week 2 Challenge Part 2: Drawing in 3D
Fit a control point curve in the tubes included in this model. Use the exact number of points indicated by the layer name.
f Chris
í Week 2 Challenge Part 1: Tracing
Use the image below to trace the figures shown in red. Each figure indicates the drawing tool you should use and two of them have specific instructions about the number of points your drawing should have.
f Chris
í Assignment 1
Part 1: Software
Purchase and install Rhino and Keyshot. Purchasing this software is not optional.
Part 2: Tutorials
Complete the “Pull Toy” and “Flashlight” tutorials from the Rhino 5 user’s guide.
Part 3: Glasses
Working from the brief for Project 1: Glasses, create the following content:
1. Description
Write a brief text description of your design proposal. Your description must include the following content:
- 1 sentence profile of the museum, include the name of the museum, location of the museum, area(s) of focus (for example: contemporary art, civil war history, New England wildlife, etc)
- why your design is appropriate for this context
- 3 descriptive adjectives that characterize the aesthetic qualities of your designs
2. Development Sketches
Sketching is versatile tool for a designer, and is particularly helpful to resolve forms and solve modeling challenges when working with 3D CAD. Use sketching to develop the initial concept and form of your glasses’ design. Sketch on 8.5” x 11” sheets of paper. Scan or take legible photographs of the sketch(es) that guided your modeling. We recommend using Photoshop to clean up this image. Bring your sketches to class next week.
3. Rhino File
Your Rhino file must satisfy the following criteria:
- Each glass must be modeled solely with a single revolve
- Each glass must be a solid
- Place each glass on its own layer and name the layer accordingly
- Place each revolve curve on a sub-layer for each glass and name the layer accordingly
- Any construction geometry worth saving should be placed on a layer(s) with clear, logical naming and organizational strategy
- Align the revolve axis of each glass with the origin’s (0,0,0 point) Z-axis, with the base of the glasses resting on the Top CPlane
Put this file in your personal folder on the Google Drive. Name this file Lastname_Glasses.3dm
4. Rendering
Include 2 Renderings of your glasses:
- Front orthographic view showing all glasses
- Perspective view showing all glasses
Your renderings must satisfy the following criteria:
- horizontally align the glasses so they form a neat row, arranged in the following order (from left to right): wine glass, pint glass, water glass, juice glass
- leave equal spacing between each glass
- save your renderings in JPG format, with a maximum width of 800 pixels
5. Screenshot
Include a screenshot of your revolve curves with the control points turned on. Your screenshot must satisfy the following criteria:
- compose this screenshot in an orthographic view
- explode any joined curves
- horizontally align the revolve curves so they form a neat row, arranged in the following order (from left to right): wine glass, pint glass, water glass, juice glass
- leave equal spacing between each revolve curve
- save your screenshot in JPG format, with a maximum width of 800 pixels
6. Google Doc
Create a google doc that includes all of the content listed above, in the order indicated below:
- Orthographic Rendering
- Descriptive Paragraph
- Perspective Renderings
- Screenshot of Curves
- Image(s) of Preliminary Sketch(es)
Save this document in your personal folder on the Google Drive, and copy it to the glasses assignment folder. To do this use the ‘move to’ option when right clicking on the file, navigate to the Glasses Assignment folder and hold down the option/ctrl key to enable the ‘add here” function. This is how many assignments will be collected. Name this file Lastname_Glasses.
f Chris
í Week 1 Exercises
Download this ZIP file.
Paper versions of some handouts will be distributed for your convenience.
1. Transforming Exercise
a. Follow the directions in the PDF called “TransformExercise”. Work in the Rhino file named “TransformExercises”, it contains all of the geometry you will need, with each problem on separate layers. Place your work on the corresponding layer as you go, as necessary.
2. Drawing Exercise
a. Trace the 3 objects shown in the Rhino file named “TracingExercise” using the polyline and control point curve tools.
b. Recreate the geometry indicated in the PDF called “PrecisionDrawing+RevolveExercise”.
3. Modeling Exercise
a. Recreate the revolved solid shown in problem 2b.
f Chris
Assignments
All of the assignments can be found here
| February 20, 2017 |
Assignment 1Chris |
|
| February 27, 2017 |
Assignment 2Chris |
|
| March 6, 2017 |
Assignment 3Chris |
|
| March 18, 2017 |
Assignment 4Chris |
|
| March 20, 2017 |
Assignment 5Chris |
|
| April 3, 2017 |
Assignment 6Chris |
|
| April 10, 2017 |
Assignment 7Chris |
|
| April 17, 2017 |
Assignment 8Chris |
|
| April 25, 2017 |
Assignment 9Chris |
|
| May 1, 2017 |
Assignment 10Chris |
|
| May 8, 2017 |
Assignment 11 (updated)Chris |
11 posts
Challenge
all of the challenges can be found here
| February 20, 2017 |
Week 1 ExercisesChris |
|
| February 27, 2017 |
Week 2 Challenge Part 1: TracingChris |
|
| February 27, 2017 |
Week 2 Challenge Part 2: Drawing in 3DChris |
|
| February 27, 2017 |
Week 2 Challenge Part 3: Lego FigureChris |
|
| March 6, 2017 |
Week 3 Challenge 1: PencilChris |
|
| March 6, 2017 |
Week 3 Exercise: Mustard Bottle TutorialChris |
|
| March 13, 2017 |
Week 4 Challenge: Toy BoatChris |
|
| April 3, 2017 |
Week 6 Challenge: Torqued RingChris |
|
| April 3, 2017 |
Week 6 Exercise: Chair ModelingChris |
|
| April 17, 2017 |
Week 8 Challenge: XChris |
|
| April 24, 2017 |
Week 9 Challenge: Y BranchChris |
|
| May 1, 2017 |
Week 10 Challenge: Metal SpoonCutter Hutton |
12 posts
Reference
tutorials, demonstrations, useful reference material, and how-to’s
31 posts
Setup
tips, tricks, and configuration for the various tools we’ll use
| February 20, 2017 |
Making Mac Rhino Look More Like Windows RhinoChris |
|
| February 20, 2017 |
Where to get Rhino and KeyshotChris |
|
| February 20, 2017 |
Apple Magic Mouse + RhinoChris |
|
| February 27, 2017 |
Where to find and buy Parallels, WindowsCutter Hutton |
|
| March 3, 2017 |
Commenting in Google DocsChris |
|
| March 5, 2017 |
Use the Middle Mouse Button for Increased Productivity!!!!!Chris |
|
| March 21, 2017 |
Updated Tool Library with Plywood BitCutter Hutton |
|
| March 29, 2017 |
Adjusting the resolution of Parallels for Retina DisplaysCutter Hutton |
|
| April 4, 2017 |
Mastercam Display issues in ParallelsCutter Hutton |
|
| May 14, 2017 |
Default Settings in MasterCAM (updated)Chris |
|
| May 14, 2017 |
Watch Videos Faster (or slower)Chris |
11 posts
B Recommended Settings for MasterCAM
I’ve created a PDF that has recommended settings for the contour, drill, and pocket toolpaths. You will see that things are different for the Drill operation. You should choose the “circle mill” option for the toolpath type for the drill operation. This option works better than the “peck drill” operation we used previously. You should also keep in mind that some settings are variable, such as depth, and might not necessarily need the settings indicated in the document. See the PDF below for details.
f Chris
B Step Stool MasterCAM and Rhino files
You can download the Rhino and MasterCAM files of the small step stool we have looked at in class. They are both contained in the zip folder below
https://3d2017.christopherspecce.com/wp-content/uploads/2017/04/StepStoolExample.zip

f Chris
B Switching viewports?
Hannah asked today: “Is there a keystroke to switch between viewports?”
Yes, there is:
- Windows: CTRL+Tab
- Mac: Command +Tab
You can also toggle maximizing the active viewport by pressing CTRL (windows) or Command (Mac) + M
f Chris
B Another explanation of surface continuity
This page has a perhaps more entertaining way to discuss surface continuity, but it also covers higher orders of continuity – G3 and G4.
https://www.augi.com/articles/detail/an-introduction-to-surface-continuity
f Chris
B More about NURBS
If you’re curious to learn more about NURBS, I’m sharing a couple of links that go more in depth on how this geometry works.
This article links to a somewhat comprehensive definition of NURBS
http://www.rhino3d.com/nurbs
This article links to two other that are more deep in their description, with equations and formulas that are quite complex:
http://www.mactech.com/articles/develop/issue_25/schneider.html
http://web.cs.wpi.edu/~matt/courses/cs563/talks/nurbs.html
The Wikipedia page for NURBS is also a useful reference:
https://en.wikipedia.org/wiki/Non-uniform_rational_B-spline
f Chris
B Content from the Demo in the CNC Lab
Here is some of the content that was introduced in the CNC lab, but in slide form.
f Chris
B Cat Face Tutorial
Follow along to the Cat Face Tutorial here:
https://risdbankcnc.squarespace.com/introduction/
f Chris
B Useful SrfSeam Command
One tool we want to ensure everyone knows about is the SrfSeam command which could be very important on the paper model project.. This tool allows you to move the seam of a surface, for instance where the wrapped surface of a cylinder meets. This command won’t work on polysurfaces so you will have to explode or extract the surface you’d like to adjust. Attached are a few images of using the command to move the seam of a cylinder away from where another cylinder is bisecting it. Moving the seam will affect how the Unroll developable surface creates the pattern.


B Strange Looking Glass Rendering?
Does your rendering look like this:

This is happening because there are two surfaces occupying the same space. One that is using a glass material, the other is using the dark liquid material. The software tries to display both of them, but an interference pattern results. You will need to select the object with the glass material and turn it off. you can do this in Rhino, but if you are already in Keyshot, you can do it there as well. There are two ways to do this:
This page shows how to use the scene tree to select an object and turn it off
https://www.keyshot.com/manual/keyshot6/?section=scene-tree
But you can also delete it. From the scene tree, select the object you want to delete and then right click and select delete from the list of options (shown here):
https://www.keyshot.com/manual/keyshot6/?section=duplicating-models
In Rhino, you can also run the command SelDupAll (Edit>Select>Duplicate Objects) to find any duplicates that might be in your model.
This link provides an illustrated explanation. It’s geared towards SolidWorks users, but the concept is the same.
f Chris
B Unroll Surface Video Demonstration
This video provides an in depth review of the “Unroll” command
You can download the model used in this video here:
https://3d2017.christopherspecce.com/wp-content/uploads/2017/03/UnrollVideoDemoModel.zip
f Chris
B Video Review of Make2D
If you’re looking for a review of the Make2D command that was covered in class, here’s a video that provides a quick refresher. FYI – this video isn’t mine – it’s from Polyplane.com
f Chris
B Extrusions Aren’t Solid!?
In an email Hannah asked:
I have drawn and extruded it different ways a billion times but it wont create a solid extrusion like it will for the circular seats. The two extrusions always have space between them even though solid is checked off in the extrusion menu. I’ve tried to join the two extrusions and make a surface to go between them, and make surfaces before extruding, but nothing has worked. Do you have any idea of what isn’t working?

- Select one of the curves
- select the properties inspector on the right side of the rhino window – the one with two concentric circles on mac, a rainbow wheel on windows
- expand the “details” drop down on mac, on windows, click on the “details” button
- look to see if it says the curve / polycurve is “open” or “closed”
- repeat for the other curve
f Chris
B “History” functionality in Rhino
We didn’t look at this in class, but the “History” functionality in Rhino could be very useful as you are work on building the three bentwood chairs. This functionality will link input and output geometry. In other words, it can connect a curve (input geometry) with a pipe (output geometry) so that if the input curve is manipulated, the resulting output surface will follow this change.
More information here:
http://docs.mcneel.com/rhino/5/help/en-us/commands/history.htm
f Chris
B Chair Cane and Wood Texture
Here are two images that can be used to simulate a caned surface as was demonstrated in class.


A basic review of how to do this:
- Assign the objects you want to have this texture with a “Matte Paint” material with any color (other materials will work as well, but this is a good start)
- Find this material in the list of in-use materials from the materials inspector, double click on it
- Click on the “Textures” Tab
- Assign the black and tan image to the “Color” texture option
- Assign the black and white image to the “Opacity” texture option
- Make sure the option for “sync” is turned on from the bottom of the textures properties
- Adjust the scale as needed with the slider or by entering a number in the field associated with the scale slider

And here is a wood texture you can use
f Chris
B Navigating the view of your workspace
By now I am hopeful that you all understand the basics of navigating the view of your model with the various functions we discussed in class.
Zoom (remember, zooming focuses on the cursor position)
- CTRL (windows) or Command (mac) + hold right click and drag forward (in) and backward (out)
- scroll wheel up and down
- pinch on trackpad (mac). You should use a mouse though.
Pan
- shift + hold right click and drag
- two finger drag on trackpad. Again, use a mouse.
Rotate (aka tumble, orbit)
- hold right click and drag
- two finger hold click and drag on trackpad. But of course, you will be using a mouse
Sometimes when you are viewing your model, you can get lost. This can happen if you zoom in or out to far or your rotate away from your object. When this happens, you can Zoom the “Extents” of your workspace. This means that the “camera” will reposition to display all of the objects contained in your workspace. To do this you can:
- click on the “ZoomExtents” button from the toolbar (looks like a magnifying glass surrounded by four triangles
- from the drop down menu select View>Zoom>Zoom Extents
- Type the command Zoom”, then pick the option “Extents”
Another thing that sometimes happen is you either can’t zoom in, or out any further than you are, or when you rotate the view, your object doesn’t stay centered in the viewport. This happens when the “focus” of the “camera” is not where you want it to be. A useful command to remedy this is Zoom Target. This allows you to select a point to recenter the focus of the camera. To do this you can:
- click on the “Zoom Target” button from the toolbar (it is the right click function of the “Zoom” button, which looks like a magnifying glass that is partially over a square drawn with dotted lines
- from the drop down menu select View>Zoom>Zoom Target
- type the command “Zoom”, then pick the option “Target”
Once the command is running you will be prompted to select a new target. Click where you want your target to be placed, then you can draw a rectangle to establish the extents of the view.
f Chris
B A review of Rhino’s interface and Geometry Types
If you need a refresher, here is a review of the Rhino interface.
And here is a review of the various kinds of geometry you can work with in Rhino.
f Chris
B How to make a screenshot
The drinking glass assignment requires that you take a screen shot of your revolve curves. Here’s how to do this:
Windows and mac:
Make sure the viewport you want to capture is active, then run the command – ViewCaptureToFile.
Also FYI:
the Mac OS has an easy to use screen capture tool built in. Press Shift+Command+4 and a cursor will appear that allows you drag an area to capture as a screen shot. You should hear a shutter sound, this means that the image is saved to your desktop.
Windows has a built in app called “Snipping Tool” that can be used for screen shots.
f Chris
B More information on the “PictureFrame” command
If you’ve seen Part 1 of the Drinking Glasses Demo videos, then you’ve gotten a taste of what the PictureFrame command can do. This is a great tool and I use it all of the time if I need to bring in an image to use as an underlay for tracing, modeling, reverse engineering, etc, etc. Here is a more in-depth look at how it works.
f Chris
B Drinking Glass Demo Part 3: Rendering with Keyshot
Part 3: This Video demonstrates how to do a basic rendering with Keyshot, including how to set up the kinds of materials you may want to use for this project.
f Chris
B Drinking Glass Demo Part 2: Volume Analysis
Part 2: How to measure the volume of your glass.
Commands used in this video:
- box
- booleansplit
- volume
f Chris
B Drinking Glass Demo Part 1: Drawing and Revolving
Part 1: A review of the drawing and modeling techniques required to complete the drinking glass assignment.
Commands used in this video:
- Pictureframe
- Curve (control point curve)
- fillet
- BlendCRV
- Scale1D
- join
- explode
- revolve (full circle)
f Chris
B How to use the trim, split, join, explode, and cap commands
An introduction to several useful editing commands in Rhino.
The commands covered in this video are:
Trim
Split
Join
Explode
Cap
Fillet (with radius set to a value of 0)
f Chris
 Chris
Chris
The infamous brush May 14, 2017
Since many of you enjoyed reading my note to James about the brush I damaged, here’s what the rest of it looked like:
 cutter@observatorydesign.com
3d Printing Lecture May 5, 2017
-
Classroom
Drawing for Furniture: 3D
Rhode Island School of Design
Department of Furniture Design
semester: Spring 2017
FURN-2511, Sections 01 & 02 (3 credits)
2nd Floor of Prov-Wash Building, Room 202 and 237B
Mondays, 1:10pm - 6:10pm
instructors: Christopher Specce, Cutter Hutton
view the syllabusTags
Project Briefs
Index
- Announcements (21)
- Assignments (11)
- Challenge (12)
- Reference (31)
- Setup (11)
-
About
Drawing for Furniture: 3D is a class in the Department of Furniture Design at the Rhode Island School of Design

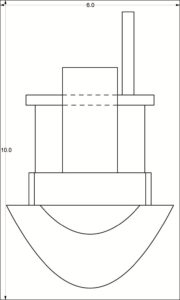
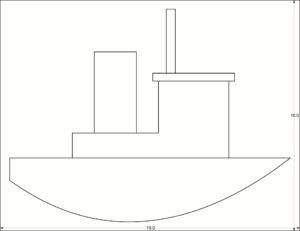




Leave a Reply
You must be logged in to post a comment.